Apache is the one of the best web server used by all the Web hosting company. As the days passed on, all the customers need double the speed of Apache. So wat can be the solution.
Sol: LITE SPEED. Apache + Apache = Light speed.
Follow the link to know about LiteSpeed. "http://www.litespeedtech.com/"
How to install Lite Speed?
INSTALLATION:
To download the software you will need to do the following:
Another option is to copy the direct link and download the file manually on your Cloud Server. For purposes of demonstration we will show you this option. The link below was valid at the time of writing and may have changed -- please adjust accordingly.
After you 'space' through the license you will be prompted with the following:
The next screen that appears will ask you what directory you would like to install LiteSpeed. The default directory is sufficient. Simple press Enter to accept the default.
The next prompt will ask you for the administrative login that you would like to use for the administrative console. Simply press Enter to accept the default.
Enter the password that you'd like to use for administering your web server. Please make sure this is secure as it has the power to stop your server! Press Enter once you have entered it.
Enter an e-mail address for the server administrator. This will be displayed on error messages so the server administrator may be contacted in the event of server failure.
Next you will be prompted for the user that the web server should run as. Leave it the default user of nobody and press Enter.
You will be asked for the group next. Press Enter.
Next you will be prompted for the port that the web server should answer on. Default HTTP traffic is port 80. Because the default port that the server selects is not correct, type in 80 and press Enter.
You will be prompted for the port that the administrative control panel should answer on. We will select the default port of 7080. Simply press Enter.
You will be asked if you would like to install PHP support. For our demonstration we will turn on PHP support. Type Y and press Enter.
You will then be asked for the default PHP extension. Select the default PHP and press Enter.
Next you will be prompted to install AWStats, a web-traffic logger. For our demonstration we have chosen to not install it. Press N and then press Enter.
A large amount of text will pass (please read!) and then you will be prompted if you would like LiteSpeed to start automatically. Press Y and then Enter.
If that step completes successfully you will be asked if you would like to start LiteSpeed now. Press Y and then press Enter.
If the server starts successfully you will be given an output that looks similar to the one below:
If you receive a similar screen then you have successfully installed LiteSpeed! Be sure to check out your administrative control panel at http://12.34.56.78:2086/. Change 12.34.56.78 to your IP address. If you changed the administrative port number you will have to change that as well.
--Hemanth Kumar N
Sol: LITE SPEED. Apache + Apache = Light speed.
Follow the link to know about LiteSpeed. "http://www.litespeedtech.com/"
How to install Lite Speed?
INSTALLATION:
Download LiteSpeed
Now we need to download the LiteSpeed web server. This walk-through will cover installation of the free Standard Edition.To download the software you will need to do the following:
- Visit the LiteSpeed download page
- Scroll down to LiteSpeed Web Server Standard Edition: Free
- Download the file associated with Linux (x86)
- Transfer the file to your Cloud Server (not covered in this tutorial)
Another option is to copy the direct link and download the file manually on your Cloud Server. For purposes of demonstration we will show you this option. The link below was valid at the time of writing and may have changed -- please adjust accordingly.
# cd ~
# wget http://www.litespeedtech.com/packages/4.0/lsws-4.0.3-std-i386-linux.tar.gz
You will see the wget utility appear and it will download the file. Once it has finished you will be returned to the prompt.
Installing LiteSpeed
We need to unpack the LiteSpeed package that we downloaded. Type the following command to unpack: (note that your file name may be different)# sudo tar -zxvf lsws-4.0.3-std-i386-linux.tar.gzNow we need to enter the directory that we extracted the files into:
# cd lsws-4.0.3We are now ready to start the installer. Type the following command to start the installer:
# sudo ./install.shYou will be prompted with a license agreement. Read the agreement and press the space bar multiple times until you reach the end.
After you 'space' through the license you will be prompted with the following:
IMPORTANT: In order to continue installation you must agree with above
           license terms by typing "Yes" with capital "Y"!

Do you agree with above license?
Type Yes at this point and press Enter. Note that you *must* put a capital Y. The next screen that appears will ask you what directory you would like to install LiteSpeed. The default directory is sufficient. Simple press Enter to accept the default.
Please specify the destination directory. You must have permissions to
create and manage the directory. It is recommended to install the web server
at /opt/lsws, /usr/local/lsws or in your home directory like '~/lsws'.

ATTENTION: The user 'nobody' must be able to access the destination
           directory.

Destination [/usr/local/lsws]:
The next prompt will ask you for the administrative login that you would like to use for the administrative console. Simply press Enter to accept the default.
Please specify the user name of the administrator.
This is the user name required to log into the administration web interface.

User name [admin]:
Enter the password that you'd like to use for administering your web server. Please make sure this is secure as it has the power to stop your server! Press Enter once you have entered it.
Please specify the administrator's password.
This is the password required to log into the administration web interface.

Password:
Retype the password again.
Enter an e-mail address for the server administrator. This will be displayed on error messages so the server administrator may be contacted in the event of server failure.
Please specify administrators' email addresses.
It is recommended to specify a real email address,
Multiple email addresses can be set by a comma
delimited list of email addresses. Whenever something
abnormal happened, a notificiation will be sent to
emails listed here.

Email addresses [root@localhost]:
Next you will be prompted for the user that the web server should run as. Leave it the default user of nobody and press Enter.
As you are the root user, you must choose the user and group
whom the web server will be running as. For security reason, you should choose
a non-system user who does not have login shell and home directory such as
'nobody'.

User [nobody]:
You will be asked for the group next. Press Enter.
Please choose the group that the web server running as.

User 'nobody' is the member of following group(s):  nobody
Group [nobody]:
Next you will be prompted for the port that the web server should answer on. Default HTTP traffic is port 80. Because the default port that the server selects is not correct, type in 80 and press Enter.
Please specify the port for normal HTTP service.
Port 80 is the standard HTTP port, only 'root' user is allowed to use
port 80, if you have another web server running on port 80, you need to
specify another port or stop the other web server before starting LiteSpeed
Web Server.
You can access the normal web page at http://<YOUR_HOST>:<HTTP_PORT>/

HTTP port [8088]: 80
You will be prompted for the port that the administrative control panel should answer on. We will select the default port of 7080. Simply press Enter.
Please specify the HTTP port for the administration web interface,
which can be accessed through http://<YOUR_HOST>:<ADMIN_PORT>/

Admin HTTP port [2086]:
You will be asked if you would like to install PHP support. For our demonstration we will turn on PHP support. Type Y and press Enter.
You can setup a global script handler for PHP with the pre-built PHP engine
shipped with this package now. The PHP engine runs as Fast CGI which
outperforms Apache's mod_php.
You can always replace the pre-built PHP engine with your customized PHP
engine.

Setup up PHP [Y/n]: Y
You will then be asked for the default PHP extension. Select the default PHP and press Enter.
Suffix for PHP script(comma separated list) [php]:
Next you will be prompted to install AWStats, a web-traffic logger. For our demonstration we have chosen to not install it. Press N and then press Enter.
AWStats is a popular log analyzer that generates advanced web server
statistics. LiteSpeed web server seamlessly integrates AWStats into
its Web Admin Interface. AWStats configuration and statistics update
have been taken care of by LiteSpeed web server.

Note: If AWStats has been installed already, you do not need to
      install again unless a new version of AWStats is available.

Would you like to install AWStats Add-on module [y/N]? N
A large amount of text will pass (please read!) and then you will be prompted if you would like LiteSpeed to start automatically. Press Y and then Enter.
Would you like to have LiteSpeed Web Server started automatically
when the server restarts [Y/n]? Y
If that step completes successfully you will be asked if you would like to start LiteSpeed now. Press Y and then press Enter.
[OK] The startup script has been successfully installed!
Would you like to start it right now [Y/n]? Y
If the server starts successfully you will be given an output that looks similar to the one below:
[OK] lshttpd: pid=4517.

LiteSpeed Web Server started successfully! Have fun!
Testing LiteSpeed
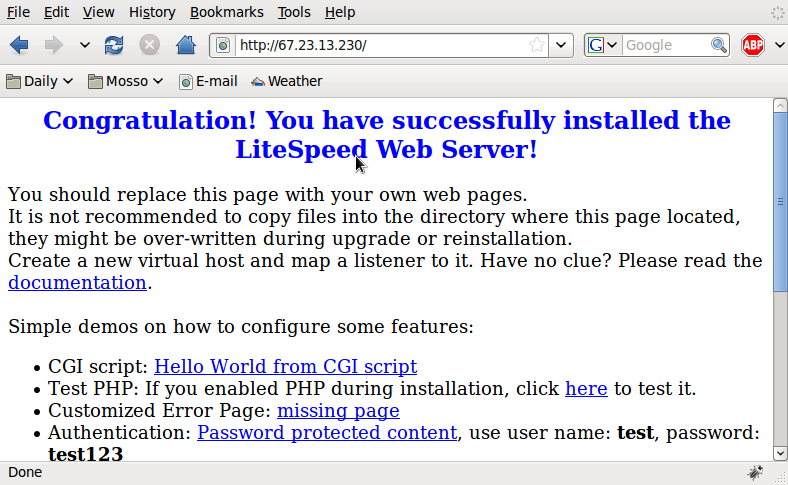
Open up your web-browser and point it to your Cloud Server's IP address (or domain name if you have DNS setup). You should see something like the following: If you receive a similar screen then you have successfully installed LiteSpeed! Be sure to check out your administrative control panel at http://12.34.56.78:2086/. Change 12.34.56.78 to your IP address. If you changed the administrative port number you will have to change that as well.
--Hemanth Kumar N
1 comment:
There are many different types of web hosting. Most packages come with certain capabilities for users.
Post a Comment